Beyond the Wheel: A 10-Step Guide to Hand-Building Modern Ceramics
Ceramics. For many, the word conjures images of a potter’s wheel, spinning clay into elegant, symmetrical forms. While wheel-throwing is a mesmerizing and revered art form, it’s far from the only path to creating stunning pottery. Enter hand-building: an ancient, versatile, and incredibly rewarding method that allows for unparalleled creative freedom, especially when aiming for modern aesthetics.
Hand-building liberates you from the constraints of perfect symmetry, inviting organic shapes, sculptural forms, and textures that are distinctly unique. From minimalist planters to abstract sculptures or earthy dinnerware, hand-building techniques like pinch, coil, and slab construction offer a rich vocabulary for expressing contemporary design.
Ready to sculpt your vision into tangible ceramic art? This 10-step guide will walk you through the essential process of hand-building modern ceramics, designed to equip beginners and inspire those looking to break free from the wheel.
Before You Begin: The Essentials
Before your hands even touch the clay, ensure you have these fundamental items:
- Clay: Mid-fire stoneware clay is an excellent starting point for beginners – it’s forgiving and versatile.
- Work Surface: A canvas-covered board or a plaster bat prevents sticking and helps absorb moisture.
- Basic Tools: A wooden modeling tool, a wire cutting tool, a needle tool, a sponge, a small bucket of water, a rubber rib, a metal rib, and a rolling pin (if using slabs).
- Plastic Sheeting: To keep your clay moist between work sessions.
- Safety: Always work in a well-ventilated area, especially when sanding dry clay or mixing glazes. Consider a dust mask.
The 10-Step Guide to Hand-Building Modern Ceramics

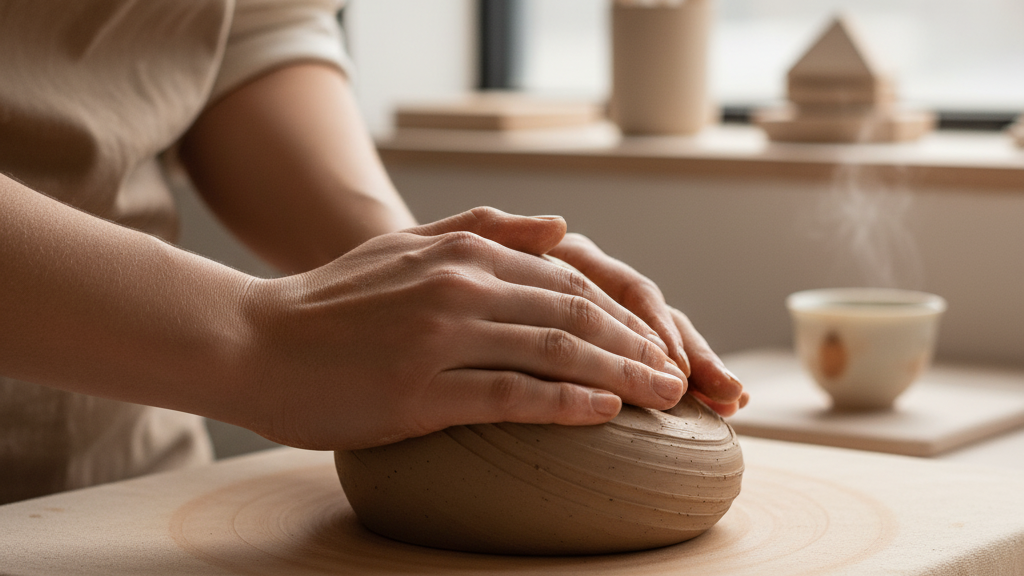
Step 1: Wedge Your Clay (The Foundation of Success) Think of wedging as kneading dough. This crucial first step removes air bubbles (which can cause explosions in the kiln!) and homogenizes the clay, aligning its particles for better workability.
- Technique: Use the “ram’s head” or spiral wedging method. Firmly push down and away, then curl the clay back towards you, rotating slightly with each push. Aim for about 5-10 minutes until the clay feels uniform and smooth.
- Modern Tip: Proper wedging ensures your modern, minimalist forms won’t crack unexpectedly.
Step 2: Choose Your Construction Method (Pinch, Coil, or Slab) Your design will dictate your technique. Modern ceramics often blend these methods.
- Pinch Pot: Ideal for smaller, organic forms like cups, small bowls, or sculptural elements. Start with a ball of clay, press your thumb into the center, and pinch the walls evenly between your thumb and fingers, rotating as you go.
- Coil Building: Excellent for creating taller, more controlled forms like vases, larger bowls, or abstract vessels. Roll clay into long, even coils.
- Slab Building: Perfect for geometric, architectural, and very structured forms like boxes, plates, or square planters. Roll out clay evenly with a rolling pin or slab roller.
- Modern Tip: Consider combining methods. A slab base with coiled walls, or a pinched interior expanded with slabs, can lead to unique modern silhouettes.
Step 3: Begin Building Your Form Let’s assume we’re building a sleek, geometric vase using the slab method as an example, as it lends itself beautifully to modern design.
- Slab Prep: Roll your wedged clay to an even thickness (around 1/4 to 3/8 inch for most projects). Use wooden guides or a slab roller for consistency.
- Cutting Shapes: Use a needle tool or a sharp knife to cut out your desired shapes (e.g., rectangles for walls, a square for the base). Modern design often favors crisp lines and precise angles, so take your time here.
Step 4: Score and Slip (The Ceramic Glue) This is non-negotiable for joining clay pieces securely. “Scoring” creates a rough surface, and “slip” (a mixture of clay and water, like a thick paste) acts as the adhesive.
- Process: Wherever two pieces of clay will join, use a needle tool or scoring tool to make cross-hatch marks on both surfaces. Then, apply a generous amount of slip to one of the scored surfaces.
- Modern Tip: Don’t be afraid to leave evidence of your joins. A visible, intentional seam can be a striking modern design element.
Step 5: Join and Blend Press the scored and slipped pieces together firmly. Then, use your finger or a modeling tool to blend the seam.
- Internal Blending: Reach inside the form if possible to smooth the seam from the inside.
- External Blending: Use a wooden tool or your finger to smooth the exterior seam. For crisp modern lines, you might gently scrape away excess clay with a metal rib to achieve a sharp edge.
- Modern Tip: Consider leaving a distinct, visible seam for an industrial or deconstructed aesthetic that suits contemporary design. Alternatively, achieve seamless perfection for a minimalist look.
Step 6: Refine Your Form (Shaping and Smoothing) Once the basic structure is assembled, begin to refine its shape. Use rubber or metal ribs to smooth surfaces, remove imperfections, and gently coax the clay into its final form.
- Tools: A rubber rib is excellent for compressing and smoothing curves, while a metal rib can achieve very sharp, flat planes ideal for modern pieces.
- Modern Tip: Focus on clean lines, consistent curves, and purposeful angles. Step back frequently to assess your form from all sides. Less can often be more in modern aesthetics.
Step 7: Add Details or Texture (Optional, but Impactful) This is where your piece truly begins to take on its unique character.
- Subtractive: Carve patterns, incise lines, or cut out sections.
- Additive: Attach small coils, balls, or flattened pieces for raised textures.
- Impressions: Press natural materials (leaves, fabric), stamps, or textured tools into the clay.
- Modern Tip: For modern designs, consider geometric carvings, minimalist incised lines, or contrasting smooth and textured sections. Negative space can be a powerful design element.
Step 8: Drying – The “Leatherhard” and “Bone Dry” Stages This is a critical, often underestimated, stage. Slow, even drying prevents cracking and warping.
- Leatherhard: The clay is firm enough to handle without deforming, but still moist enough to carve or attach pieces. This is the ideal stage for final trimming, carving, or adding handles.
- Bone Dry: All moisture has evaporated. The clay will be lighter in color and feel completely dry to the touch. This stage is crucial before firing.
- Process: Cover your piece loosely with plastic for a few days to a week (depending on size and climate) to ensure slow drying. Gradually uncover it. Avoid direct sunlight or drafts.
- Modern Tip: Uneven drying can distort crisp lines. Be patient!
Step 9: Bisque Firing (The First Transformation) Once bone dry, your piece is ready for its first firing in a kiln. This transforms fragile “greenware” into durable, porous “bisqueware.”
- Temperature: Bisque firing typically occurs between Cone 08 and Cone 04 (around 1700-1940°F / 927-1060°C).
- Result: The clay becomes harder and can no longer be rehydrated, but it’s still porous, allowing it to absorb glaze.
- Modern Tip: Some minimalist pieces look stunning left as unglazed bisqueware, celebrating the natural texture and color of the fired clay.
Step 10: Glazing and Final Firing (Adding Color and Protection) Glazing is where you add color, sheen, and a protective, food-safe surface to your bisqueware.
- Application: Glazes can be brushed, dipped, or poured. Apply 2-3 even coats, allowing each to dry between applications. Leave the bottom of your piece unglazed or wipe it clean to prevent it from sticking to the kiln shelf.
- Modern Aesthetics in Glaze:
- Matte Finishes: Often preferred for their understated elegance and tactile quality, complementing clean lines.
- Monochromatic Palettes: Whites, blacks, grays, and earthy tones are staples of modern design.
- Contrasting Textures: A smooth, glossy interior with a matte, textured exterior.
- Partial Glazing: Glazing only a section of the piece, allowing the raw clay to show through in others, creating intriguing visual breaks.
- Speckled/Toasted Clay: Choosing a clay with natural iron speckles can add a subtle, organic modern touch when paired with transparent or semi-transparent glazes.
- Glaze Firing: The final firing, typically to a higher temperature (e.g., Cone 5 or 6 for stoneware, around 2167-2269°F / 1186-1243°C), melts the glaze into a glass-like surface.
Embracing the Modern Aesthetic in Hand-Built Ceramics
- Form Over Function (Sometimes): While functional pieces are wonderful, modern ceramics often lean into sculptural forms, exploring shape and negative space.
- Minimalism: Clean lines, simple geometry, and an uncluttered aesthetic.
- Texture: Deliberate use of texture, or the absence thereof, to create visual interest.
- Earth Tones & Neutrals: A palette that often reflects natural materials and understated elegance.
- Asymmetry & Organic Forms: Breaking from perfect symmetry can create dynamic and contemporary pieces.
- Visible Process: Allowing tool marks, seams, or the natural qualities of the clay to be part of the finished aesthetic.
Conclusion: Your Hands, Your Vision
Hand-building ceramics is a journey of patience, creativity, and tactile exploration. It allows you to slow down, connect with a primal material, and translate your unique vision into lasting forms. By understanding these fundamental steps and keeping an eye on modern design principles, you’ll discover that the absence of a wheel is not a limitation, but an invitation to unparalleled artistic freedom. So, gather your clay, trust your hands, and begin shaping your own piece of modern ceramic art. The possibilities are as limitless as your imagination.